Subscribe
Gear Reviews

Hear Technologies: Hear Back PRO Review

When I heard that I’d been invited to review the Hear Back PRO system from American company Hear Technologies, the early days of Aviom, another American company which kind of kick started the fashion for personal monitor mixing, sprung to mind. Of course, things have moved on since then and nearly every desk manufacturer has its own brand of personal mixing system, all designed to put control back in the hands of the musician and negate the need for a dedicated monitor board and monitor engineer.

In reality there is often a learning curve involved with such systems and as the FOH engineer, I have spent far more time on stage or in the pit than I wanted showing musicians how to customise and set up their mixes, as well as saving and recalling, not to mention labelling channels, routing specific FX etc.

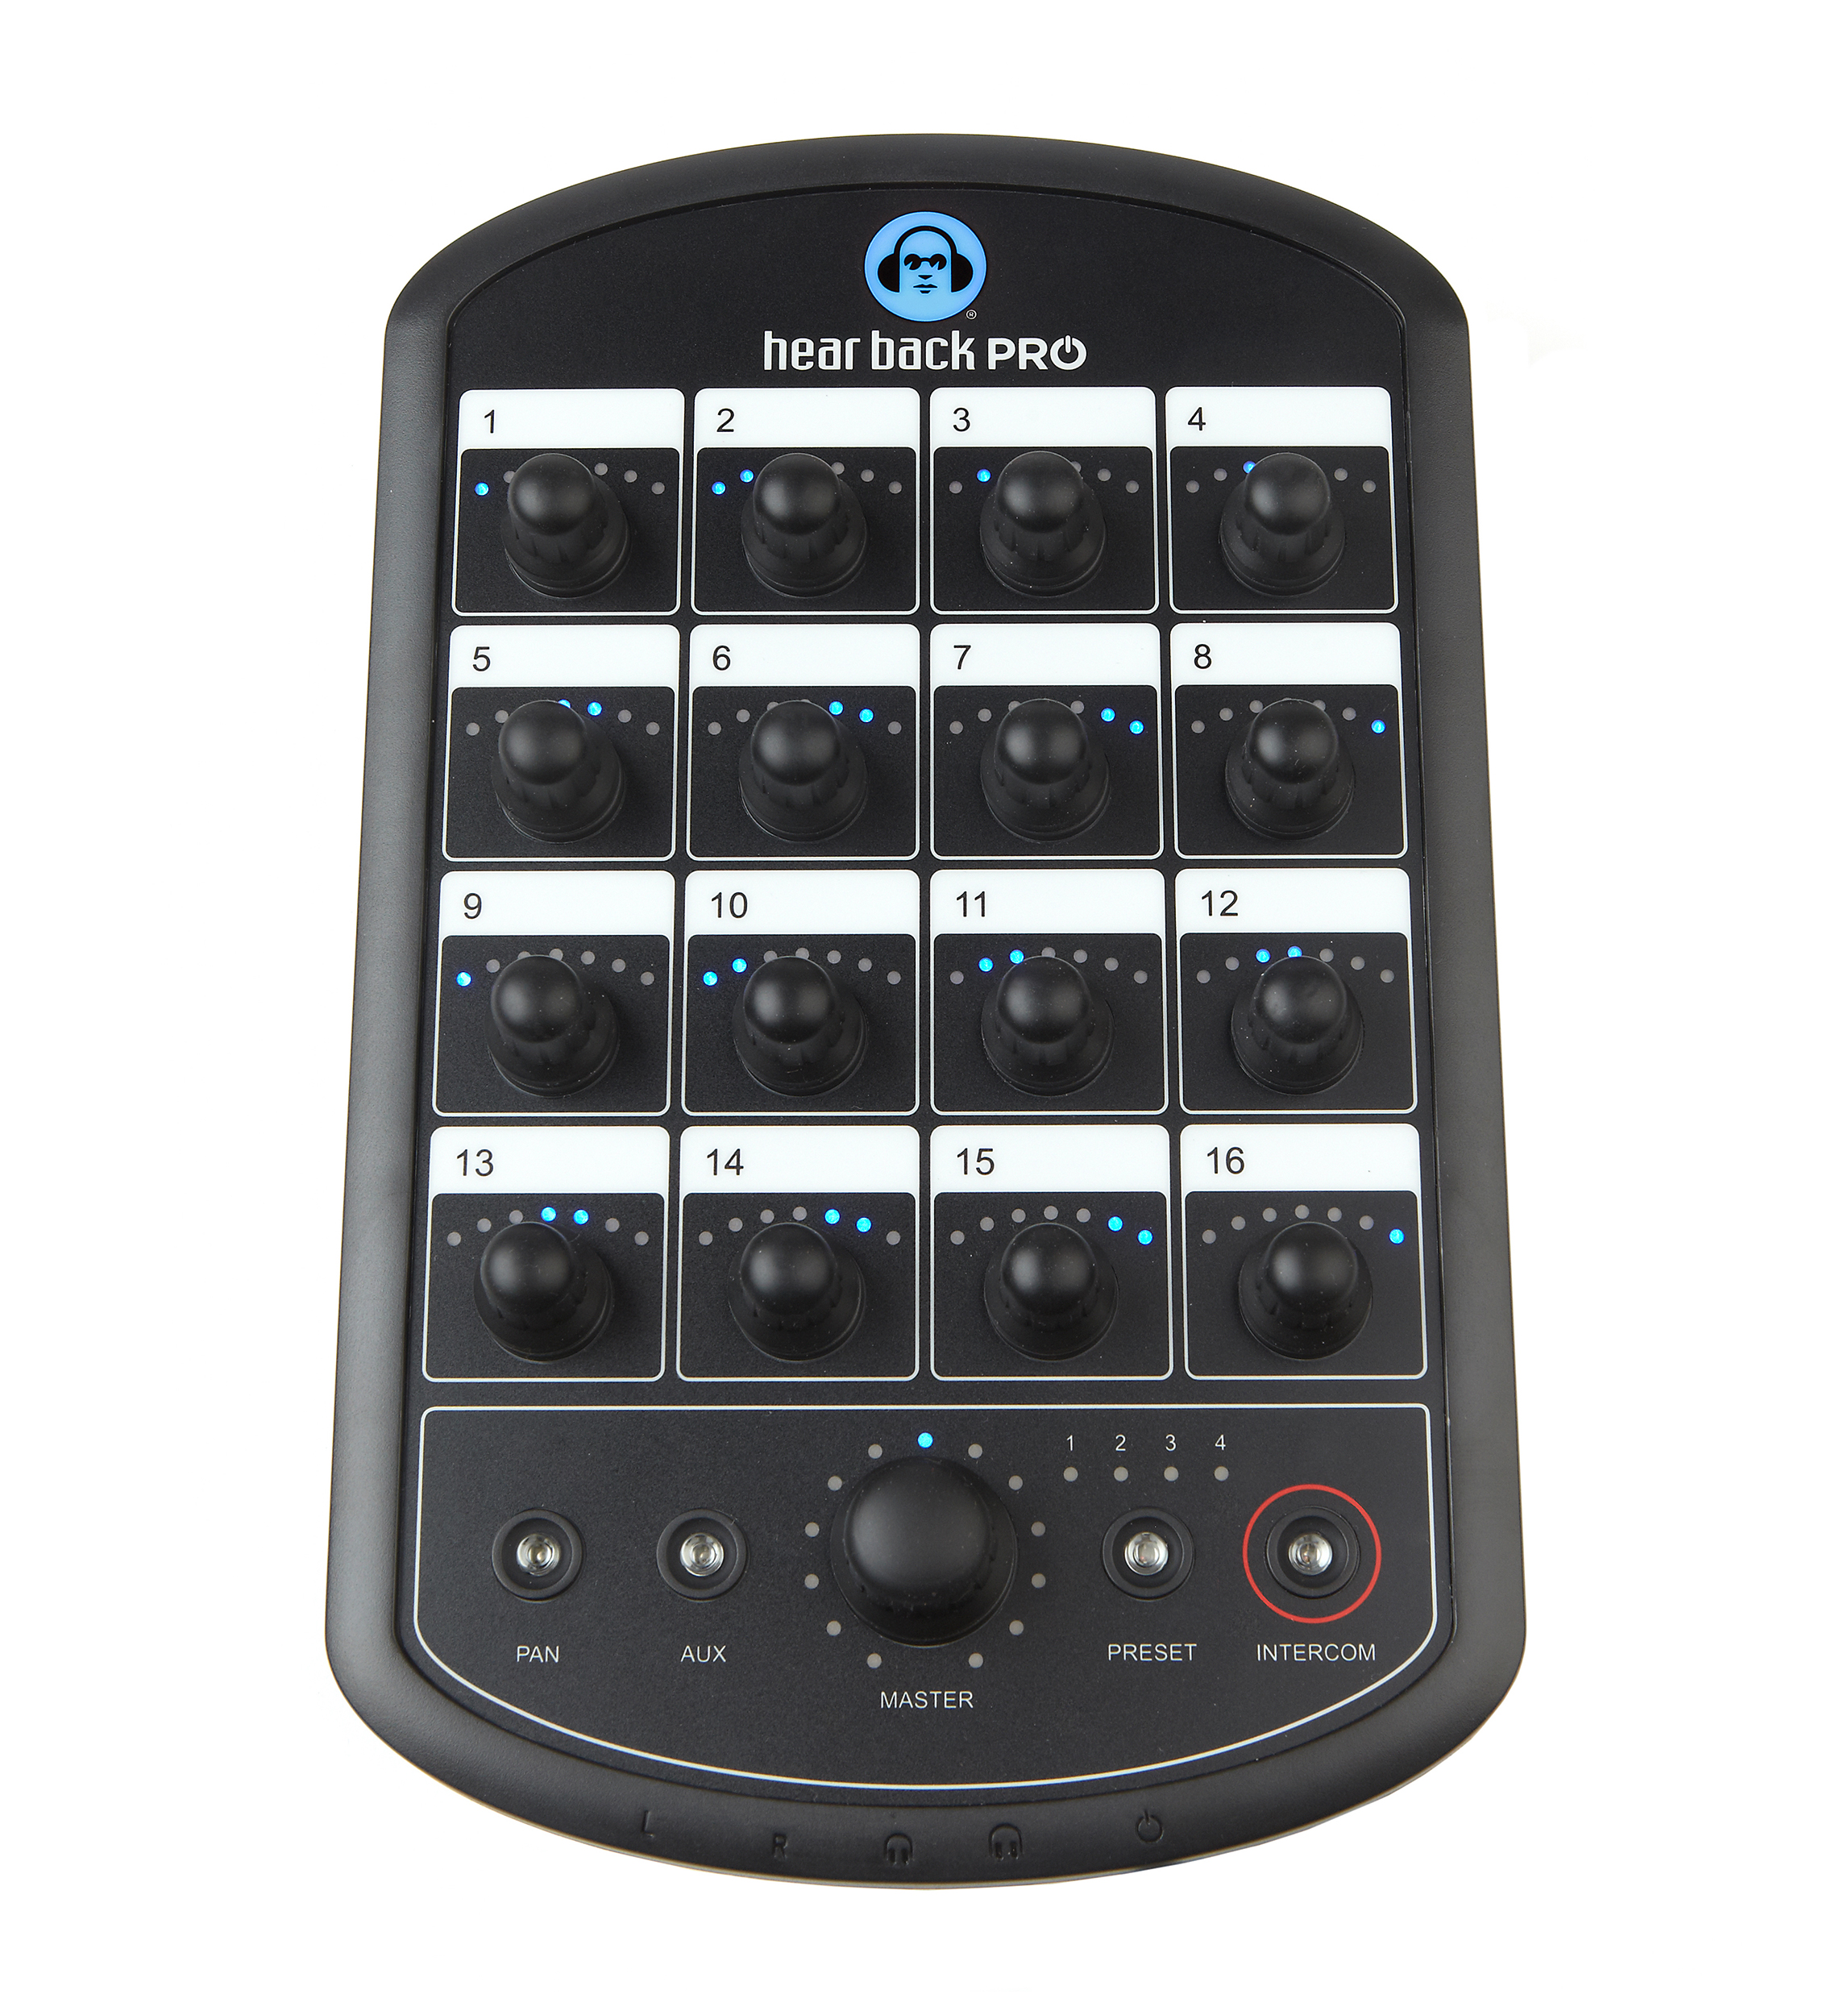
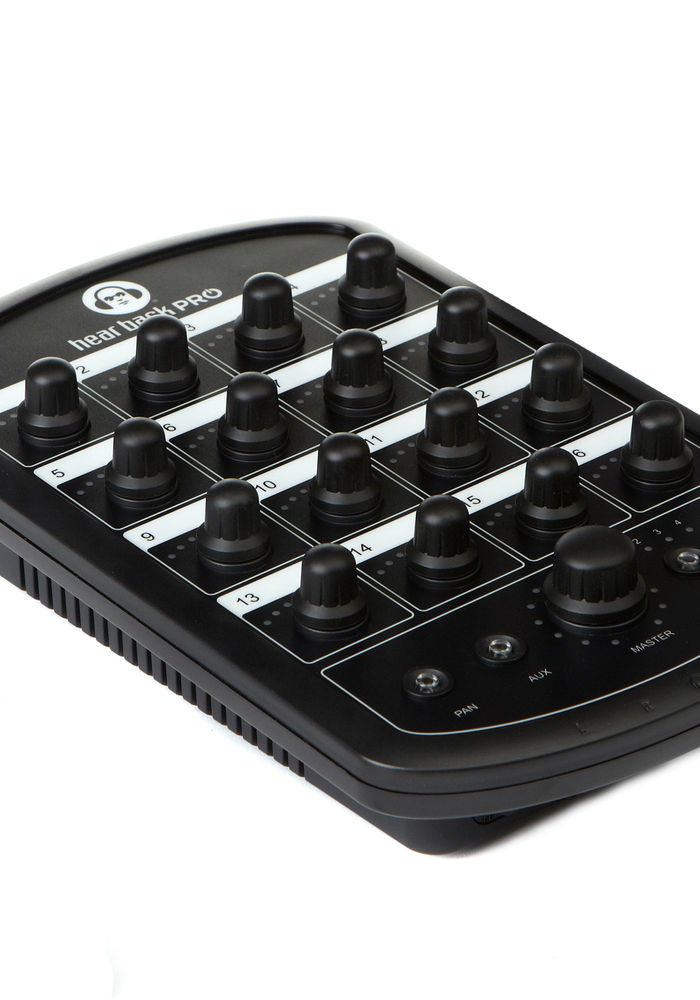
So SCV, Hear Technologies’ UK distributor, shipped me a kit which included the Hear Back PRO Hub, 4 x 16 channel Hear Back PRO Mixers, the power supply and associated Cat6 cabling, all in a very tidy black canvas carry case with a bunch of adjustable padded dividers to keep everything pristine.

Straight From The Heart

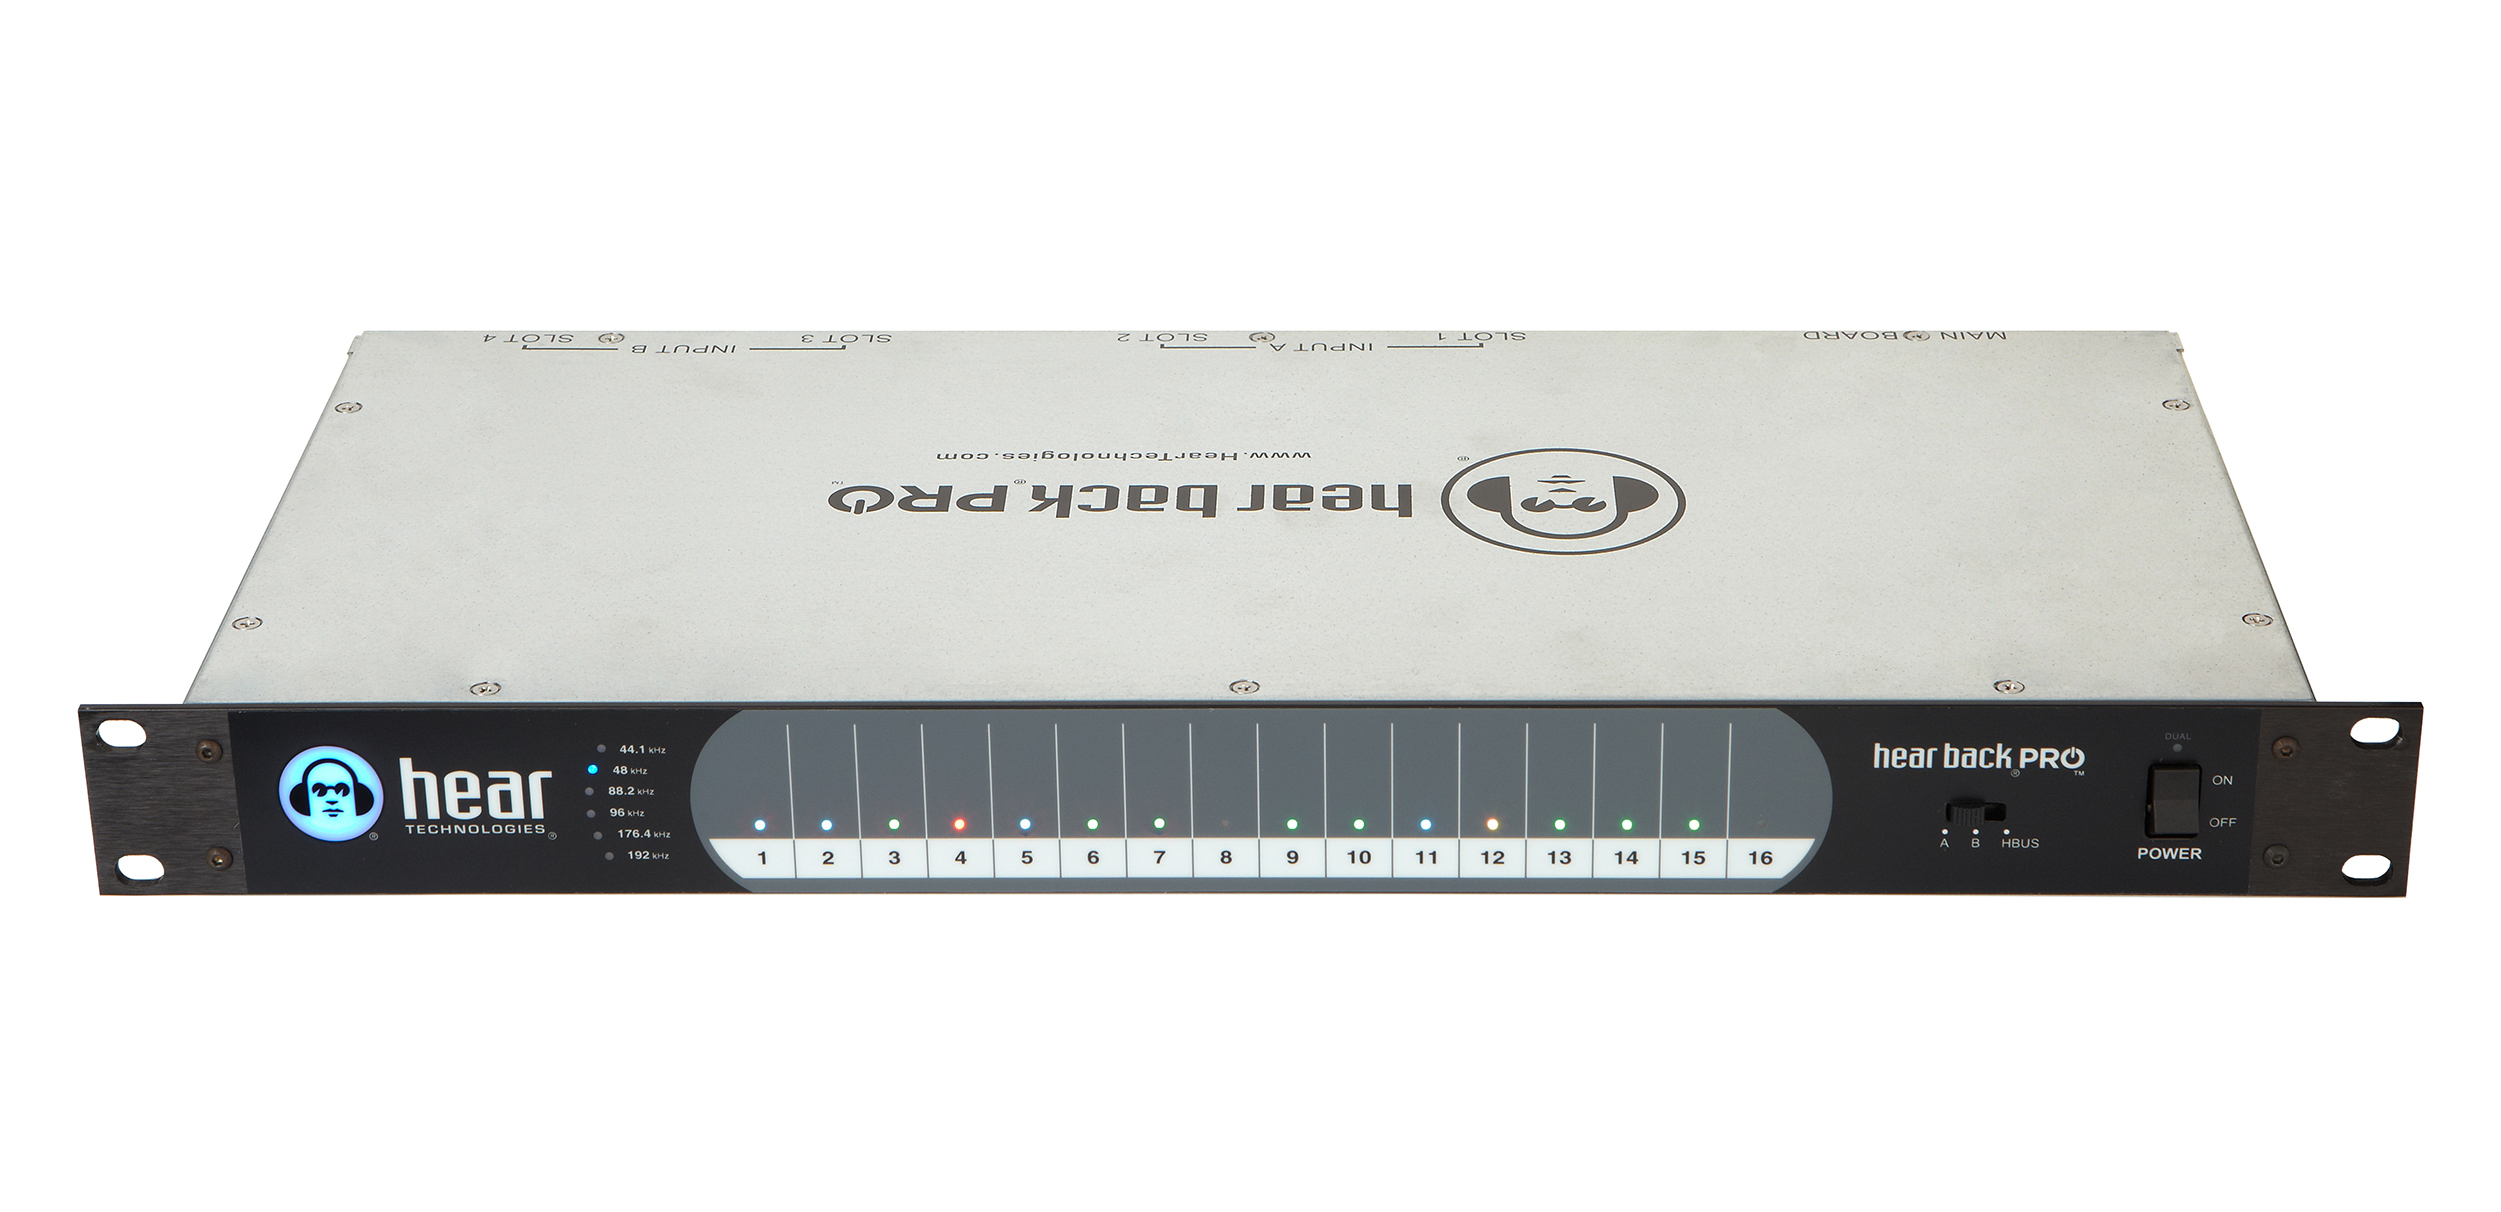
At the heart of the system is the Hear Back PRO Hub. I was asked in advance which input interface would suit the setup I have at home for review purposes, and I plumped for a Dante card. However I could’ve picked between analogue with Tascam style D-subs, Waves, ADAT and AES as well as Dante. I have Dante Virtual Soundcard and Dante controller installed on both my Macs as well as a couple of live desks with Dante interfaces and a number of other Dante enabled devices, so it made logical sense to go down this route rather than Waves SoundGrid or analogue cards and D-sub snakes from my Apollo x8p.

I have a couple of shows in Q-Lab on my MacBook Pro, one being a show where the songs have multiple stems assigned to 16 tracks; some in stereo pairs and others as single mono tracks for easy mixing at the FOH desk.

After a straightforward one-to-one assignment of the 16 channels from Q-Lab to the Hear Back PRO Hub by means of the Dante Controller software, I plugged in one of the four Hear Back PRO Mixers to the Hub via a cat6 cable; it immediately sprung to life with a rather impressive light show. Now all that was required was for me to plug in a set of Jerry Harvey Audio JH16s, turn a few of the blue lit rotary pots and voila: instant audio!

I think the first thing I was aware of, however, was not how unbelievably quick and simple this system is to use, but how good it sounds – and boy, does it sound good! I haven’t yet delved deeply into this fully featured system and already I’m in love with it.

The Hub

The Hear Back PRO Hub comes fitted as standard with a network card and dual power supply. This serves as both a redundant power supply system or additional power should you be using your Hub with more than one 8-port Mixer network card. Clock speeds of 44.1kHz to 192kHz are supported and should your studio be running a master clock, there is a separate Word Clock Card available.

A really useful feature and one touched on earlier when I mentioned the light show upon powering up the PRO Mixer, is the same multi-coloured LEDs also indicate the status of the Hub in the Hear icon on the left of the front panel, glowing red if there’s a status or sample rate mismatch. The same colour scheme is used on each channel to indicate those receiving audio, and glow from a healthy blue through amber to red when high signal levels are received.

The front panel features an A/B/H-bus switch which lets you select between different input card formats or from the Hub’s network card, should your input cards be on a second Hub. To accept straight analogue audio via a balanced line XLR or TRS jack, you’ll need to have a pair of analogue input cards as each only supports one D-sub (D-88 wiring) 8 channel input.

Lastly but by no means least I must mention the Virtual Mixer Card. This is a Hear Back PRO Mixer on a card and is designed primarily to provide a stereo pair of balanced line outputs for your mix in the rack, where it’s likely your IEM transmitters also reside. This removes another pair of balanced line cables which would otherwise need to run back to your IEM radio rack for use by the more mobile members of your band or show.

Mixing It Up

Now the Hear Back PRO Mixer is a light but strong, compact ABS unit with rubber feet and a mic stand mount underneath, which impressed me immensely from the moment I plugged in its network cable. It runs a boot and power up sequence which scrolls through the LEDs, checks the status of the mixer, and lights the Hear icon blue, or if a fault is found, red. The front panel sports four rows of four pots numbered one to 16; each pot has an arc of seven LEDs across the top which indicate the level of the pot, but double up as illumination for the scribble strips. At the bottom of the front facia are two buttons, Pan and Aux, followed by a large master pot, and two more buttons for Preset and Intercom.

By default the Mixer’s LEDs are deep blue, and if you leave the mixer in any other mode it will eventually, after 30 seconds or so, return to this dark blue state. While in this state, the rotary pots are volume controls for each channel. When you press the Pan button all the LEDs turn green and the rotaries for each channel become pan pot. Now if you press and hold the Pan button for three seconds the LEDs flash green. In this mode you can link corresponding channels together to make a stereo channel.

Now, onto a couple of features which I have seen on other personal monitor systems but which I can’t remember being so easy to use or so well laid out: next to the Pan button is an Aux button which routes the aux input by means of the master pot to your headphones. Technically, this makes the system an 18 track personal mixer but of course that aux input is exclusive to your mixer - very handy if you want to refer to an arrangement during a rehearsal or take a phone call without taking out your IEMs. Also extremely useful if you’re a drummer who likes to refer to a metronome at the start of songs without taking up valuable tracks on the system, or without any audible indication of what you’re up to.

However, if your aux selector switch is selecting your XLR input, which has phantom power I might add, you can use it as a local ambient mic or as a means of increasing the instrumentation in your own personal space or to help communication with other band members. Which leads me nicely onto the Intercom button.

This takes the XLR input regardless of whether it’s routed to the aux or not and sends it to all users on the system. Very useful for the conductor, control room engineer, musical director, etc. Only individuals with an attached mic can talk on the system and in any event, only a maximum of four intercoms can transmit on the system at any one time.