Subscribe
Home Recording

How to Process Vocals: 8 Pro Vocal Processing Techniques

Headliner CEO, Paul Watson shares eight quick-fire techniques on how to process vocals...

When it comes to crafting the perfect song, few elements are more important than your lead vocal track. It's safe to say, the success of most popular music hangs (a great deal) on your vocal recording and how it sits within the context of an entire track. 

To help you bolster your next production, we've compiled eight tips on vocal processing techniques that will help any aspiring creative or self-producing artist get a better sound and a grasp of the essentials while working in the box.

1: Use A De-Esser

When considering how to process vocals, De-Essers are often overlooked. The first thing I’ll do in my chain is apply a de-esser - the key is not to overdo it, or you’ll risk enhancing the sibilance that you’re trying to steer clear of. Let it kick in a little on those ‘ess’ or ‘thhh’ sounds, but no more than that.

2: Cut Out The Lows (75Hz-100Hz)

Before you think about boosting anything, always start by getting rid of the frequencies you don’t want to help shape your vocal: all of that low-end ‘noise’ will make your vocal muddy, and as a result, it’ll be way more difficult to get it to cut through a mix.

3: Add Sparkle

It’s always a case of personal preference with EQ, but I personally like to add ‘air’ to a lead vocal to create sparkle. Keeping it simple, and without setting this in stone, if you’re working with a female voice, experiment in the 14-16kHz area; and for male vocals, the 8-9kHz area - and you should be in pretty good shape. Depending on the recording and the type of voice, you’ll soon see that even 1 or 2 dB can make all the difference in making it pop. Sometimes a much bigger boost can work wonders, but tread cautiously, as EQ is a powerful tool, and you don’t want to create ‘fizz’ or harshness.

View our full guide on how to EQ vocals for more on this topic.

4: Create Warmth

A lead vocal usually needs to be warm-sounding - and there are a number of ways to do this in the box. The low-mids can be a dangerous place to venture, but usually dialling in a dB or two around 1kHz (providing the high frequencies are doing their job) will give you some good results. Also, sometimes a boost around 80Hz (which may sound crazy, as this is normally bass guitar realm) might surprise you. Give it a shot, and see how you get on.

5. Apply Compression

Unless the track you’re working with was cut in a high-end facility and/or the engineer was fortunate enough to have a nice analogue front-end when cutting the vocal, it’s unlikely that any compression will be on the voice you’re working with. It’s far more likely that the vocal will have been recorded direct using a USB (or similar) interface into a MacBook or PC. So if we assume the latter, it’s key to get a compressor or two (or three..!) into this chain.

Keeping it very simple - if you are using a stock compressor in your DAW, and don’t have a library of plugins, then try this as ‘a standard’ rule (although there are no rules, of course, but that’s for another day..!): apply a 2:1 or 3:1 ratio setting, set the attack around 4ms and release time around 6ms and play with the threshold so you’re not tickling the vocal but not squashing the life out of it. It’s about control, and finding a setting that complements the voice.

If you’ve the luxury of, say, a plugin bundle that has an 1176 equivalent and an LA-2A equivalent (these are both classic compressors), then try using both: bring in the 1176 in as the hard-hitting compressor with a very fast release time and slower attack; and bring in the the LA-2A next in the vocal chain to ‘catch’ the vocal and hold it in place - nothing too crazy. This is a well known compressor combo used in many, many recordings over the years; and due to the quality of plugin technology these days it can easily be replicated in the box.

And the cherry on top? For a little ‘flavour’ at the very end of the chain, I often stick on a basic stereo compressor and let the whole chain tickle it at 1:1 or 2:1 ratio. For me, it gives a nice glue effect. Give it a try.

More on how to compress vocals in our complete guide.

6. Use AutoTune (or not?)

In modern pop music, AutoTune or an equivalent is everywhere, and for the most part (as tragic as this is), an essential for music producers who are making any living in this industry (or working for majors, at least..!) That said, it’s not all doom and gloom. I am not an advocate of AutoTune, per se, but what I have discovered is that you don’t necessarily have to use it to tune a vocal - you can get ‘a sound’ without going all Cher Believe

It’s also - in my opinion - a useful tool to consider using if you want to keep a vocal in check, as long as you don’t let it get too ‘digital’ sounding, or everything will feel contrived. Applying it liberally means it will keep the erroneous notes at bay without completely transforming the sonics. It’s a can of worms, AutoTune, but experimenting with it can be fun and can lead to some good results.

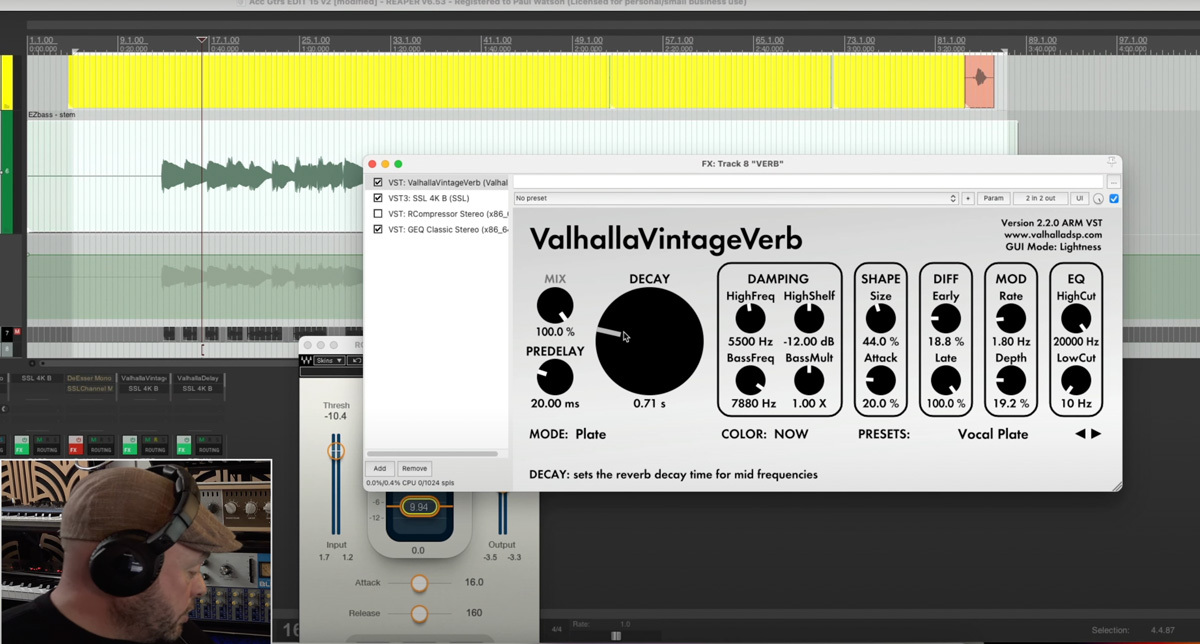
7. Get Creative With Reverb

Reverb has a funny reputation - bad singers try to hide behind it (which is mad, because you can’t, really), and good singers sometimes don’t want any of it. I think a good compromise is to use it modestly. What you must do is put the reverb on its own buss - that way, you can bring as much in or out as you like, and you can treat it as an instrument in its own right. By that, I mean the following:

EQ some of the harshness out. 6 kHz is a constant niggle for me, so I always drop a few dB out particularly when working with a female vocalist.

Compress the signal. You’ll be surprised how effective this can be, particularly as you raise the ratio and play with the threshold.

Gate the signal. Not always, but if applied correctly, with a bit of work, you can get a great effect once the voice cuts out

Experiment with mono and stereo: a reverb right down the middle is normally better in stereo, but sometimes a stereo enhancer on a mono reverb will work nicely, or panning two different mono reverbs L/R can be effective. Equally, widening the stereo image of an already wide stereo reverb can create a really expansive sound, at the risk of becoming overkill(!)

8. Use Gain Staging

Keep an eye on your levels at all times - there are plugins out there which will add more gain than others, and if you’re not careful, the more you add to the chain (and of course the natural urge is to turn up, not down), before you know it you’ll be clipping and running out of headroom and you won’t know why. The key is to get that gain right at every stage in the chain to minimise noise or distortion. So try to leave sufficient headroom from the get go, and if it gets too much at any point, don’t panic - just bring the whole track down a few dB and build it up again.

Vocal Processing Techniques: The Bottom Line

When processing a vocal in the box, the key as ever is not to overdo it. These eight tips should help get you in a good place. Keep everything simple, dial stuff back as a rule rather than turn it all the way to 11 - and be sure to listen. And keep listening. GUIs on plugins are amazing these days, and often an EQ curve is just as much fun to look at than to play with; but don’t let these fancy aesthetics get in the way of the most important part of this process: your ears.

To watch my vocal recording and vocal processing in action, check out the video below...

Further reading: 

10 Tips for Recording Pro Vocals

How to record vocals