Subscribe
Gear Reviews

Leapwing Audio DynOne: The Ultimate Mastering Tool?

Headliner gets to grips with Leapwing Audio’s acclaimed DynOne multi-band dynamics processor plugin to see just how useful this tool can be for mastering projects...

While I don’t profess to be anywhere near competent enough to be a mastering engineer, I fully appreciate the expertise and experience that goes into mastering the great music that we consume on a daily basis. A great mastering engineer will not only get the best out of a mix for all the formats on which it’ll be published, but will often pass on feedback as to where a mix could be improved.

However, with a move to more performance and feel-oriented music, with mixes created as the music evolves, getting the perfect mix is easier said than done. Mastering engineers call upon an ever expanding arsenal of specialist tools to help give themselves every chance of success.

Leapwing Audio is one such company creating clever new ways of dealing with old, but ever present problems. I recently looked at their rather excellent StageOne plugin and I’m also a fan of CentreOne, which has a new way of dealing with a lack of width and phantom centre issues, a common problem with stereo files these days. Adding to this stable of mastering capable tools is DynOne, which as the name suggests, is a dynamic processor with a twist.

Dyner for Five

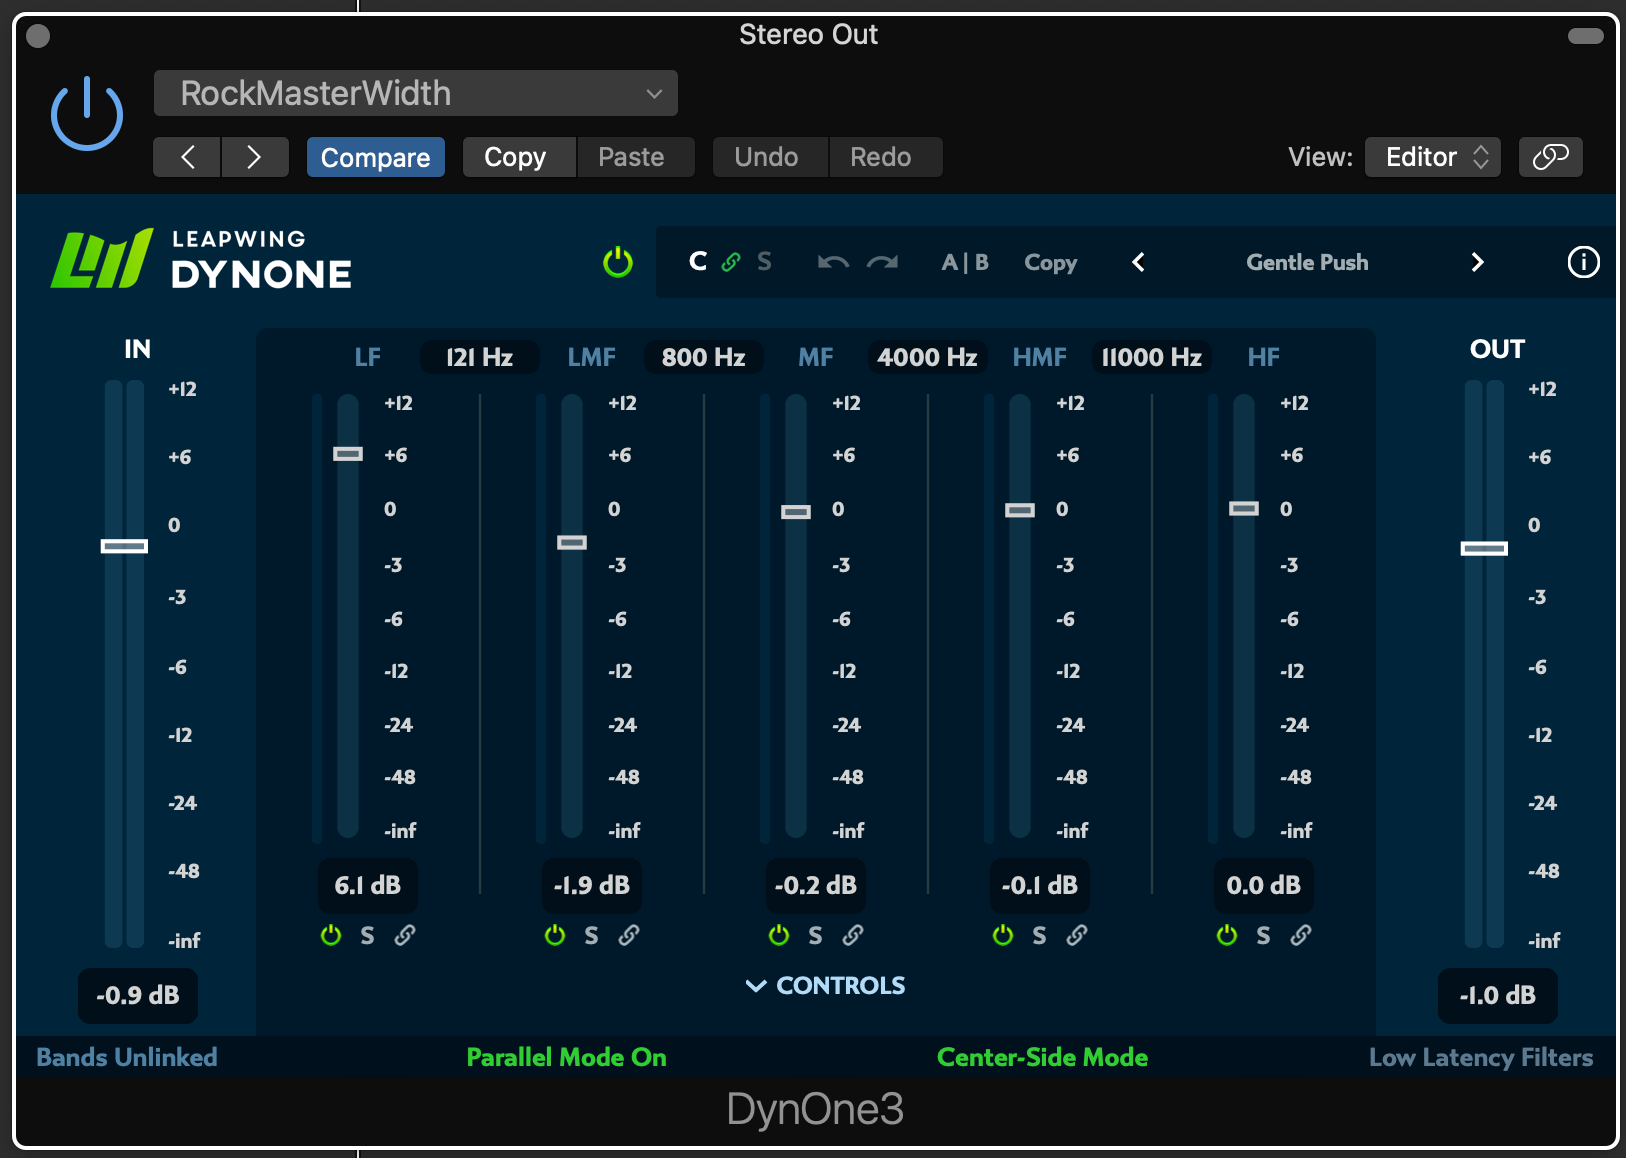
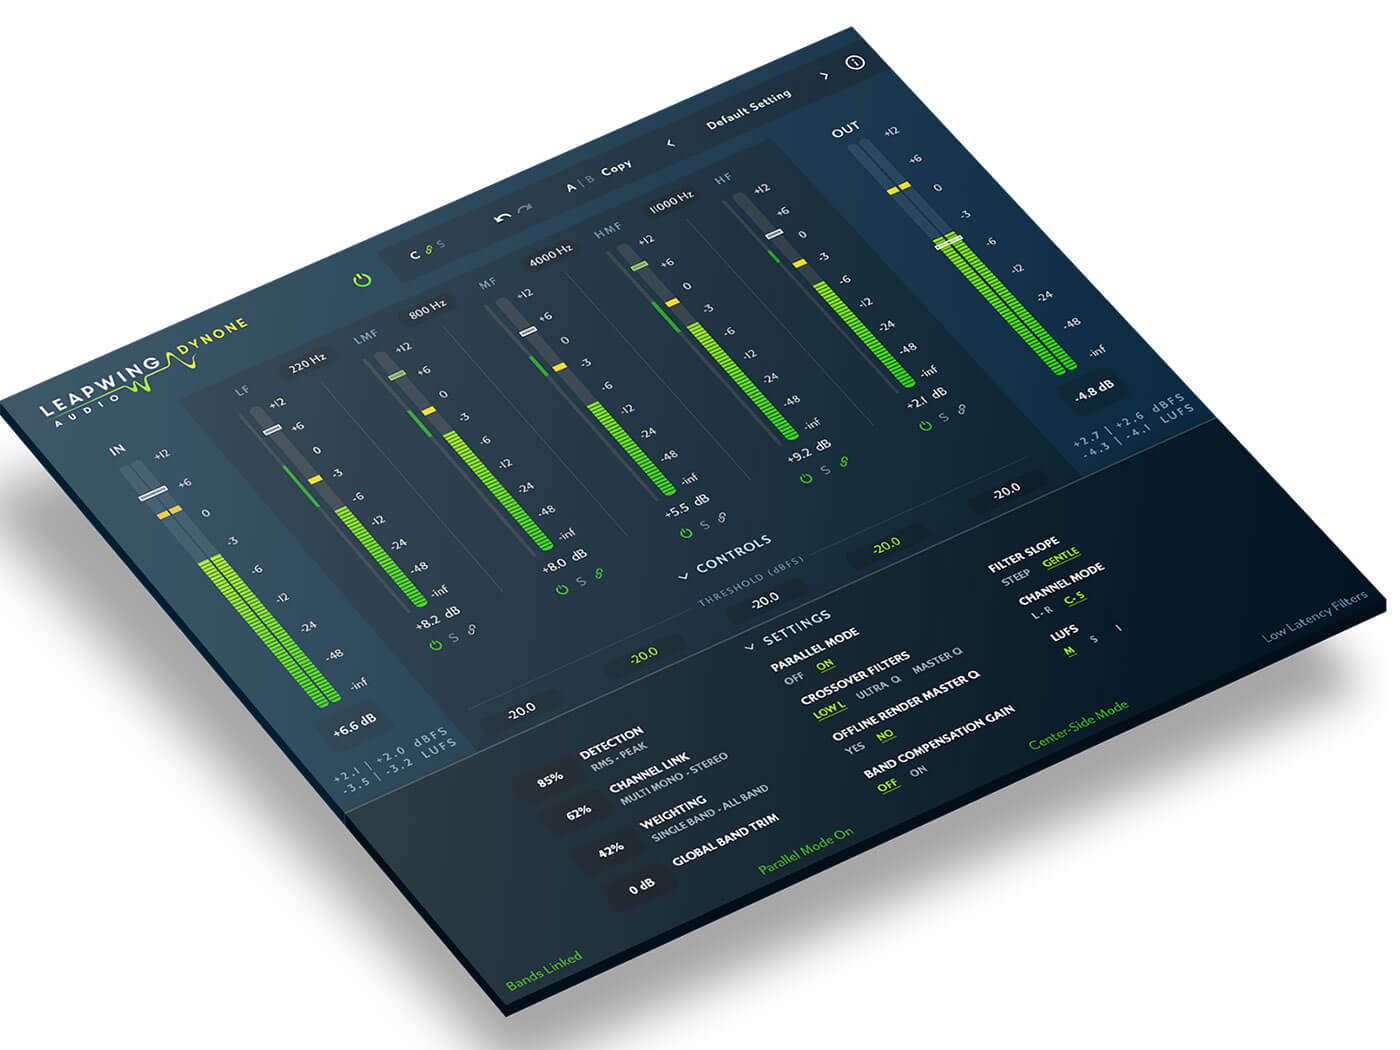
DynOne is a five band intelligent parallel compressor with some clever tricks up its sleeve. The first and most obvious thing is the rather simplistic interface, which holds a similar look and feel to other Leapwing plugins. On the left and right-hand sides are the In and Out faders. The In controls the master level in before any parallel split and the Out, the master out.

In the centre section are the five faders for each band, separated by a frequency value which can be changed by dragging up or down. The individual bands themselves can be active or disabled, while Solo lets you hear a band in isolation. The bands can also be linked or unlinked, adjusted and then relinked in any combination you like using an individual Link icon next to the Solo icon. Moving from left to right along the lower edge is the Parallel Mode On/Off button, which you can change the default position of in Settings.

The Centre-Side Mode button is well worth checking out; it stopped me in my tracks so to speak, and I got carried away listening to a variety of different source material. It is just such a great musical enhancement and at no point did it sound anything other than transparent. In Centre-Side Mode a further option appears in the top bar with a C and an S joined by the usual paper clip, and if you disconnect them you can toggle between, giving you control over the sides as well as the mono information in the centre.

Bottom right is the filter selection button which moves from Low Latency, through Ultra Quality, to Master Quality filters. As you’d expect, the higher the quality, the more processing power used. This is also true of the Centre-Side Mode which again uses more processing power than Left-Right Mode.

Parallel Thinking

To get to grips with the parallel aspect of DynOne, I left it in its default preset and went to the Parallel Mode On/Off switch on the bottom of the interface. Playing a couple of different mixes and clicking through a selection of DynOne’s presets revealed a vast change in the audio from one to the next. Clicking on the Controls section reveals a set of controls which lead you to another unique feature. The attack and release values are not set and fixed; they are specified as a range and then intelligently act within that range as a measure of guidance. This would go some way to explaining why, even though the presets were so wildly different in terms of the nature of the resulting sound, the majority were truly transparent.

This is the heart of the dynamic compressor, and again Leapwing has come up with a unique solution to varying and dynamic audio. The most obvious difference is that the traditional Knee control has gone in favour of a fluid self-defining attack and release speed, operating within a set of guide parameters. You could say that with an intelligent algorithm monitoring the source audio, it’s better placed to make that kind of on-the-fly judgement.

You’re still able to tailor how much compression you need with the Ratio, and when with the Threshold. Although soloing an individual band to make adjustments was quick and easy, I did find the disparity in level between Parallel Mode On and Band Solo slightly off-putting, having to adjust the output slider up approximately +12dB and then remembering to drop it back down before switching back into Parallel Mode.

Again, the option to adjust a value in all the bands at the same time is there by using the Bands Linked button. I found and could hear some of the tricks which mastering engineers might employ for particular situations and I surprised myself at how, what looked like a pretty complex plugin, actually proved to be relatively easy for a novice to multi-band parallel compression to understand.

Conclusion

As I may have mentioned earlier, I’m no mastering engineer, but that doesn’t mean I can’t appreciate the unique thinking behind this plugin. I was impressed by the sound quality first and foremost. The phase-linear filters are clean and flawless, whether that be low latency, ultra quality or master quality. This is a unique approach to intelligent compression, and with the rather amazing sound in Centre-Side Mode, this plugin is very impressive. With support for sample rates up to 384kHz (DXD) and available as a 64-bit plugin in VST, VST3, AAX and AU on macOS and Windows, this is a serious tool at a modest price.