Subscribe
Gear Reviews

Waves OVox Review

We’ve all heard of a vocoder and a voice doubler - and although Waves OVox performs both those tasks very well, it’s way more of a powerhouse plugin than that. It’s all about Vocal ReSynthesis. Let’s dive in...

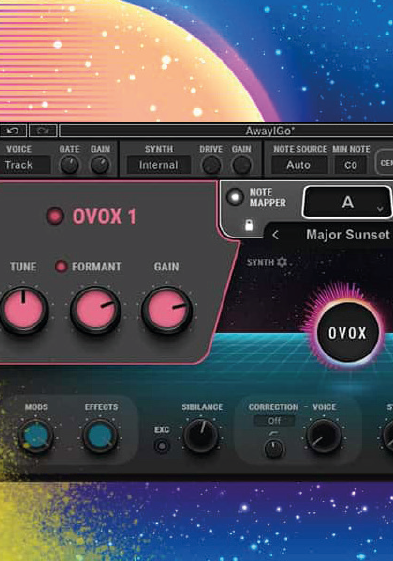
First off, Waves OVox looks great – its slick neon pink and purple aesthetic makes you want to play with it right away, and in my experience, when a plugin manufacturer puts such effort into the look, it normally means it’s pretty special, and therefore the sonics follow suit.

As with all Waves plugins, OVox comes with a ton of presets – and incredible presets in this case, it must be stated: dedicated, intricate algorithms are programmed in for everything from vocal comping, vocoding, doubling, voice FX, and sounds dedicated to additional instrumentation. Some presets are even designed with specific genres in mind: hip hop and soul, to name just a couple. So a lot of thought has gone into this plugin, which is always great to see.

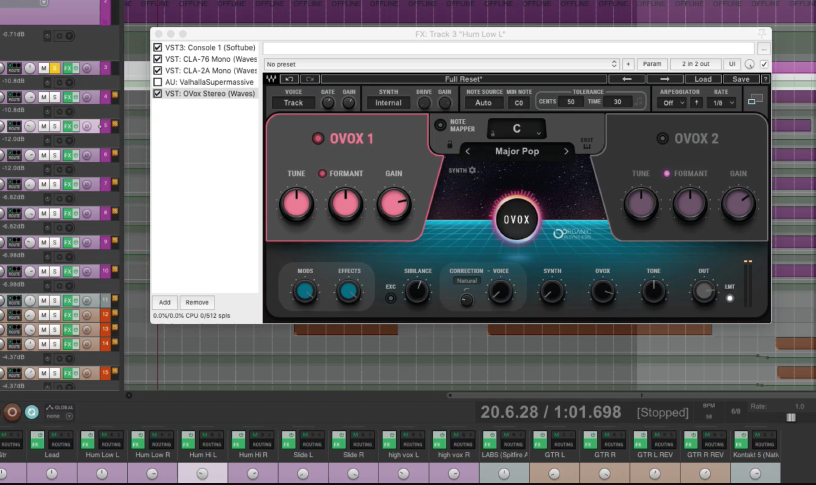
The GUI is very friendly, and can be viewed simply or in more detail. I stick to the former to kick things off.

I begin by dropping an instance of OVox onto a ‘hummed’ backing vocal. The song I’ve chosen is in the key of F Major, and the vocal melody starts on an F, and descends through E, D, and C, finishing on Bb. A nice gentle progression with clear notes. Why am I telling you this? Because of the OVox’s ingenius Note Mapper.

The Note Mapper sits in the centre of the GUI, and allows you to choose a key. I set it to F, and lock it in with the padlock icon. I also have both engines - OVox 1 and OVox 2 - at default factory settings, currently untouched: Tune and Formant Filter are at 12 O’Clock, and Gain is at 2 O’Clock. I work my way down to the bottom of the display which is where you should get started. There are an array of dials: (L/R) Mods, Effects, Sibilance, Correction, Voice, Synth, OVox, Tone, Output.

The Correction tool is key here, and it can be set to work in several ways – Hard, Normal, Notes, and simply On/Off. Think of it as a vocoder for now (but with a twist), and we’re going to be hitting it hard, like you would to achieve that Cher effect (‘do you belie-e-eve...’) because we want OVox to register the notes that my vocalist is singing in this descending melody.

I turn up OVox, and keep Voice and Synth controls to a minimum, so it’s mainly OVox I’m listening to - and the Correction tool is picking out the notes perfectly. Now it’s about finding that perfect balance of human voice and OVox. As I bring up Voice and turn down OVox simultaneously, I start to find my happy medium. I settle at about 3 O’Clock and a nice metallic tone which adds a really nice texture to the vocal. That was easy!

Open Sesame

I now open up the plugin to reveal a more detailed dropdown menu, which allows me to explore the OVox’s vast engines and algorithms. There is massive flexibility here.

We have a Harmonics section, a dropdown menu with 12 different presets to get your teeth into, each of which you can low or hi-pass and add ‘Noise’ to for a really expansive sound. Then there is a Tune option, with the ability to fine-tune or heavily detune should you wish, and widen the stereo image with ‘Spread’. It’s a real palette of sonic options. And the cherry on top is most definitely the Formant filter which allows you to manipulate the signal with deep lows, massive mids, and soaring highs – all at the turn of one dial, complemented by a ‘Speed’ option on its right hand side, which allows you to add resonance and play with the dynamics within the signals among other things. Below this is the ‘Voice Dyn’ rotary with Pan and Gain options. There is also an EQ section to get more surgical with your tones.

Each OVox engine has an equaliser-type box from which you can pinpoint where you’d like your main vocal/instrument tone to ‘sit’ – from there, you can add Noise to that tone, low or high pass that Noise, Tune it (or fine-tune it); and that’s before you come to the Unison section which enables you to put up to four voices together (in unison, of course), play with the tunings further, and widen or narrow the image as desired. It’s phenomenally effective when putting multiple backing vocals through it or across a stereo group of vocals, particularly with ‘Spread’. You can create a seriously huge and detailed stereo image. But even on my one backing vocal, it’s a transformation.