Subscribe
Home Recording

Setting up a home recording studio on a budget

Have you been thinking about using some of your free space to turn it into a recording studio, but have cost concerns? Setting up a home recording studio on a budget has never been easier.

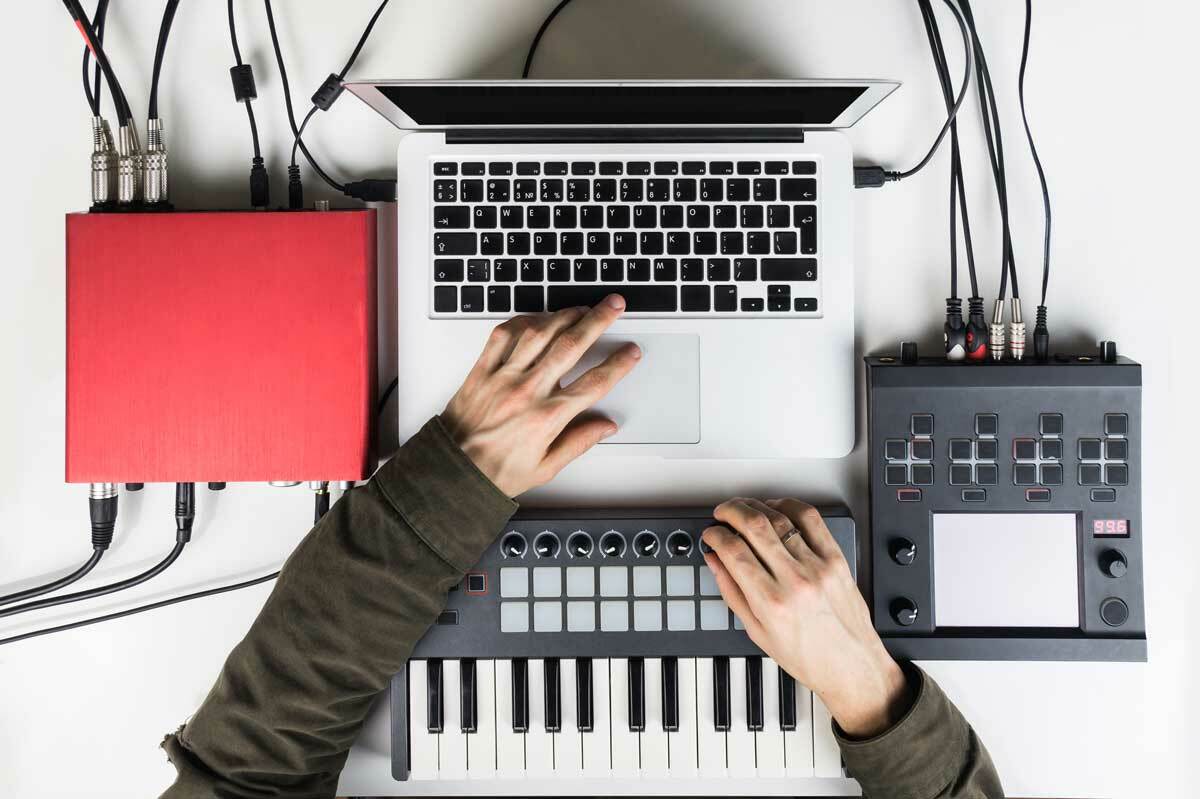
The amount of quality gear that even a modest budget can get you today is remarkable. If you focus only on what you need (at first), and be precise in your buying decisions you can assemble the perfect recording rig for you.

We’ve gone over home recording studio setup essentials you need to get started. But in this article we’re going to look at setting up a home recording studio on a budget from the ground up. We’ll analyse some acoustic concepts, how to identify the gear you need, and how to maximise the space and equipment you have to work with.


What to Consider when Setting Up a Home Recording Studio on a Budget

Building out a home studio, especially on a budget, can be intimidating at first.

Whatever budget you’re working with, it’s best to assess your needs before committing to any purchases. What type of space dimensions do you have? How will you be using it? If you’ll only be mixing, it’s a different approach than if you need to do live tracking as well.

Once you have the basic necessities figured out, make a list of everything you know you’ll need and triage your purchase list accordingly. And keep in mind, certain things are worth spending a little more on while others can serve your needs in a more affordable way.

Let’s start with the basics - the room design.
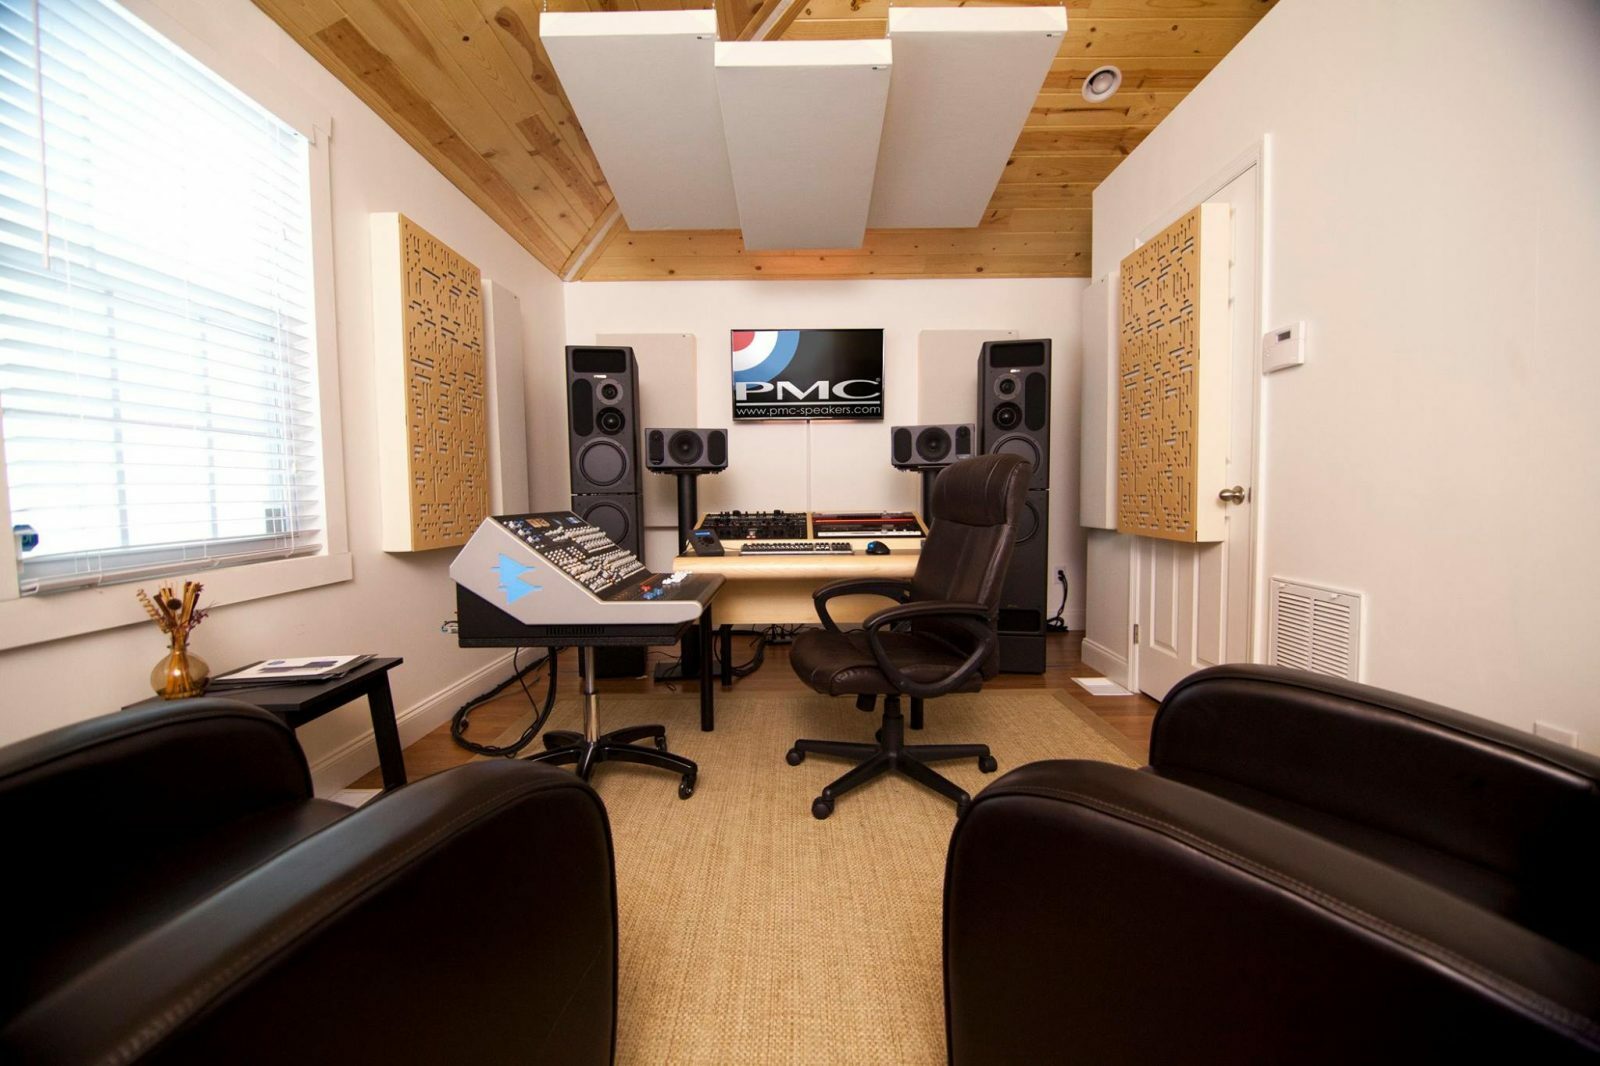
Studio Space

As fun as it is to focus on the gear you need and improving your production skills, one of the biggest concerns if you’re setting up a home recording studio on a budget, is the space itself.

Let’s be honest, it’s the most boring part of the process, but it’s one of the most important. What size room are you working in? What are the dimensions, and how is it laid out? Do you have noise constraints due to neighbours or roommates?

It can't be overstated - the room is a make-or-break factor in your overall setup. That doesn't mean you can't produce great tracks in a less-than-ideal room. But how the sound interacts within the space is critical to make your mixes translate across different types of playback systems.

If you’re working out of a residential room, it will likely have low ceilings and be a square or rectangular shape. Some things to keep in mind are reflections off of the low ceiling, or standing waves created due to right-angle corners. Square rooms also create null points that cancel certain frequencies because of the parallel walls.

But there are things you can do to make your space more sonically sound. This brings us to room treatment.


Room Treatment


When you’re setting up a home recording studio on a budget, you’re likely forced to use an available room that wasn’t intended for recording. So it can’t be overstated how important proper room treatment is.

This is especially true when it comes to the low end. Since low frequencies are longer, they take more time to develop. What you don't want are rogue frequencies flying all over the room, creating frequency masking, standing waves, and rogue frequencies that affect mixing decisions.

There are three main types of acoustic treatment mechanisms - bass traps, diffusers, and acoustic panels. They all serve a different purpose.

Bass Traps

Bass traps do just that. They’re designed to prevent stray bass frequencies from creating nulls and peaks in the low and low-mid ranges.

Right angles are the worst cause of low-end buildup, so they’re usually situated in corners. Normally smaller rooms need more bass traps, especially if the room is square.

Diffusers

This type of acoustic treatment is designed to scatter, or diffuse, sound. Diffusers reduce direct reflections travelling from the monitors back to the listening position. It’s common to place them on the rear wall behind the listening position, but this is debated. Again, it all comes down to how the room is structured.

Diffusers come in two types, 3D and 2D. The 3D version is more versatile, but there is a higher cost associated in manufacturing them so they’re more expensive.

Acoustic Panels

Acoustic panels are one of the best resources to keep frequencies from bouncing around the room and cancelling each other out. This is especially true if the walls don’t provide any sound absorption on their own.

Not only are they one of the best types of acoustic treatment, they’re pretty easy and cost-efficient to make yourself. There are multiple companies where you can purchase them already fabricated as well.

DIY

If professional room treatment is out of your budget, there are some DIY tricks that make things a little better.

For example, due to their mass, blankets draped over a microphone stand are great, especially when used for baffling amplifiers, drumkits, or the area around where the vocalist is tracking. They're also really affordable and easy to move around to different parts of the room.

You can opt for building your own items as well; it’s actually much easier than you think and there are some fantastic tutorials on the internet that guide you through the process. All you need are a few hardware items and some basic tool capabilities.


Audio Production Computer


It’s 2023. Computers are the heart and soul of almost every recording studio these days. This is especially true if you’re setting up a home recording studio on a budget.

The upside is that computers with the right specs for recording are more affordable than ever. If you’re on a Windows device, there are multiple ways you can tune the operating system to be better suited for audio production.

When looking to buy a computer for audio recording, there are a few specs to focus on:

Processor and RAM

Lag will kill a good take or session in a heartbeat, so you want to make sure that your computer has the specs that matter the most so your machine can keep up. The quality and speed of the processor and the amount or RAM are at the top of the list.

These two elements work hand-in-hand to deliver a seamless recording workflow that can accommodate large sessions with a lot of plugins.

Graphics Processing Unit (GPU)

A good GPU isn’t necessarily a requirement when deciding on which computer to buy for audio recording. But considering a lot of plugins come with robust UI (user interface), going in on a computer that has a good graphics card doesn’t hurt.

You should be able to get by with an integrated graphics card, but modular is always better if it’s an option. And if you’ll be working with video, a good GPU is pretty much mandatory.

Hard Drives

When it comes to storage, there are two options for hard drives - solid-state (SSD) and mechanical (HDD). SSD drives used to be much more costly than mechanical drives, but they’re faster and more stable. And now they’re more affordable than ever.

Since SSD drives don’t contain any moving parts, overall they’re more reliable than mechanical drives. The tradeoff is the expense and the fact they usually offer less overall storage capacity for the same price point. But this is also changing.

If you have the option of using multiple drives, it’s a good idea to use a “system drive” to operate your computer’s OS, run your DAW, and store plugins and virtual instruments. Some plugins require registry files, so keeping them on the same drive as your OS can eliminate potential complications.

The secondary drive can be used to store audio session files and sound/sample libraries. If it’s an option, you might even use a third drive dedicated just to storing sample libraries.

And remember, always back up your work!

Is a desktop or laptop better for making music?

This used to be a much more heated debate, but with modern computing, both are equally relevant. It wasn’t so long ago that you needed a very powerful laptop to run your sessions smoothly, but laptop technology has gotten so good that most people have moved their music production entirely to one. This also gives you the added benefit of mobility, so you can move to different locations or even mix on a plane!

Gaming computers are perfect for audio recording. They’re tailor-made to be powerful and fast, and they usually come with top-of-the-line processors and a good amount of native RAM, which you can usually expand if needed. And if you’re into video production, the higher-tier GPU will come in handy.

Regardless if you’re working with a laptop or a desktop that’s built with the specs you need or a custom build, as long as it has the right components, you shouldn’t have to worry about your computer being underpowered.


Audio Interface

Just like the mixing console is the centrepiece in analogue studios, modern studios revolve around the audio interface.

Audio interfaces come in a lot of different variations, from small desktop models to full rackmount units. Choosing an interface is an important decision. You’ll have to select between the primary features you need, like channel count, conversion quality, monitoring, I/O, and expandability. Some even offer onboard DSP (digital signal processing)! This frees up resources on your computer by the interface taking over some of the plugin processing.

The connection standard is another important factor. Not all computers offer the same type of ports. Many interfaces run on a USB2.0 or USB3.0 standard, but there are models that run on USBC and Thunderbolt. If you’re working with a laptop, this is an even more important consideration, as you generally have to use the ports that are available. One of the advantages a desktop computer has is that you can add an aftermarket port card to the motherboard.

Regardless of what type of connection standard it uses, you have no shortage of options when it comes to finding the perfect interface for you within your budget.


Studio Monitors

In addition to the room dimensions and acoustic treatment, studio reference monitors are one of the most critical areas where it pays to allocate a little more budget for a quality pair.

Monitors come with different sizes of drivers, so you have to assess the physical space you’re working in and make a complementary buying decision. If you have a small to medium size room, generally 5”-8” monitors should be ideal.

Larger speakers reproduce more bass frequencies, and vice versa. If you have a larger room, you could consider going with 10”, or even 12” monitors.

Most reference monitors in this size/price range are going to be active, meaning you don’t need an additional power amp for them to function. But once you get into 10” monitors and larger, some will be passive and need an amp to power them.

By investing in good monitors, you’ll be able to make better mixing decisions. But what if you have strict noise limitations or an untreated or undertreated room? That’s where a good pair of studio headphones come in.


Headphones

After studio monitors, headphones are a second point of reference for your mixes. You’ll want to choose a pair that has a full range frequency response and are comfortable to wear for long periods of time, especially if you’re using them to mix.

There are three types: closed, semi-closed (also called semi-open), and open back. They all offer a different fit and feel, as well as being better for certain stages of the production process.

Closed-back headphones offer more isolation, making them ideal to limit bleed when tracking. The tradeoff is they don’t provide as much accuracy if you want to use them for mixing. They can also be uncomfortable to wear for long periods.

A semi-closed back design still offers good isolation, but they can allow for headphone bleed. Their advantage is that they provide a more balanced sonic stage, which makes them better for mixing.

Open-back headphones are great for mixing, as the design helps create a more realistic sound stage. The downside is that sound escapes (bleed) this design more than the other two, so they’re not ideal for tracking. They’re also known to be more comfortable.

Regardless of which type you opt for, a flat frequency response is ideal so you can monitor playback without any added colouration. It’s useful to have all styles available to you, but if you have to choose just one you need to determine how you’ll use them in order to select the best design for you.

A good pair of studio headphones
is critical in the recording studio, regardless of what your noise constraints are.


Microphones

If you’re recording live sources, you’ll need at least one microphone. And if your budget only allows for one, you have to decide if a dynamic or condenser is the best choice. Ideally you would be able to add two microphones to your locker, a dynamic and a condenser. Between the two you can cover a lot of sonic ground.

Dynamics are great for recording sources like electric guitar, while a condenser is great for vocals and acoustic guitar. They complement each other well, and with both you can multi-mic sources and blend between the two.

When it comes to dynamic microphones, you can’t go wrong with the tried-and-true Shure SM57 or SM58. There’s a reason they’re two of the most popular microphones in history. They’re great at capturing midrange, they’re built like a tank, and with the proper care it should last you a lifetime. The Audix i5 is another great choice. They each retail for around $100 new.

On the condenser side, if you can only afford one, look into a large-diaphragm condenser. They’re versatile and provide more detail and articulation than a dynamic. Companies like Audio-Technica, Lewitt, and sE Electronics all offer a range of models that are great for setting up a home recording studio on a budget.

Regardless of which microphone type, make, and model you go with, you’ll want one that’s versatile and can cover a range of sources. Some have distinct EQ curves that add their own sonic characteristics to the source material and additional features like different polar patterns, pads and high-pass filters.


DAW

It wasn’t so long ago that there were only a few DAWs to choose from. This is no longer the case. Some are geared toward certain styles of music, but they all generally function under the same concepts.

Pro Tools is technically the industry standard, but the full version isn’t cheap. It also has a much higher learning curve than other DAWs. Consider more affordable options like Cockos Reaper, PreSonus Studio One, or Cubase.

Regardless of the application you go with d. You might have to try out a few before making a final decision, but with some research and hands-on use, you'll find the best application for you.


Plugins

Plugins are an area where a lot of people overspend when they're just getting started. This makes sense, because we're all flooded with marketing. And let's be honest, a lot of plugin companies run some insane deals on top-notch software pretty frequently.

In keeping with the “analogue mentality” of using a batch of tools you know get you the results you need, you want steady standbys that you know how to use well. It's easy for your plugin library to become a bloated pile of gigabytes quickly, especially when you factor in all of the great freeware that's available now.

If you're going to dedicate some budget to investing in paid plugins (and you should!), it's important to narrow down what your specific requirements are and focus on them.

And don't forget about the stock plugins that come with your DAW! They used to be an afterthought in most production circles, but there are some heavy-hitting producers and engineers that use them all the time.

Most high quality plugins, even from top-level companies like Universal Audio and Waves are very affordable. They often run sales too, especially around holidays.


Cabling

“Your life is about to become cables”. That’s what my professor in college told us on day one of recording school. And wow, is it true.

Live music has really leaned into using wireless systems for instruments like vocals and guitars. This isn't the case with the studio, so get ready to run some cables.

XLR, TRS, TS, MIDI cables…the list goes on. And you'll need multiples of most of them. But it all depends on your setup and the type of gear you're using.

Additional Gear

There are additional types of gear that help make your workflow more productive.

Things like a MIDI controller or control surface can make programming virtual instruments or drawing automation much more intuitive by adding a tactile element to the production process.

Since most recording studios are computer-based, you’ll be working on one a lot. Investing in a good trackball or high-end mouse can prevent wrist/arm injuries. And a comfortable office chair is always a wise purchase!


Summing it Up

A good recording setup is more than the sum of its parts. Each piece serves a purpose, and when you’re setting up a home recording studio on a budget you have to be precise with your buying decisions.

But remember, building out your recording setup is just one of the steps. It’s important to dedicate whatever it takes to improving your skills in audio theory and using your gear to get the sounds in your imagination to come out of the speakers.

With some proper research and deliberate buying decisions, you can find the perfect setup for your specific needs.


Further Reading

Home Recording Tips for Better Productions